
大家好,今天我想与大家分享一个极为实用的数据库文档生成工具,名为 Screw。在我们的项目中,整理数据库表结构文档是一项常见的任务。通常情况下,我们需要手动编辑和维护这些文档,而当表结构发生变化时,这种手动操作显得尤为繁琐且易于出错。
自动化生成数据库文档的需求
当数据库表数量较少时,手动维护文档或许不会造成太大困扰,但随着表的增多,维护的复杂性和出错的概率却成倍增加。因此,寻求一个高效的工具来自动生成数据库表结构文档变得尤为重要。幸运的是,GitHub 上有一位开发者开源了一款名为 Screw 的自动化文档生成工具。
项目地址:Screw GitHub
 Screw,字面翻译为“螺丝钉”,寓意着希望这个工具能切实地帮助到我们的开发工作。
Screw 目前支持市面上大多数主流数据库,包括 MySQL、MariaDB、Oracle、SQL Server、PostgreSQL 和 TiDB。而且,它的使用也十分简单,按照官网的提示,不到 10 分钟就能在本地成功运行。
快速入门指南
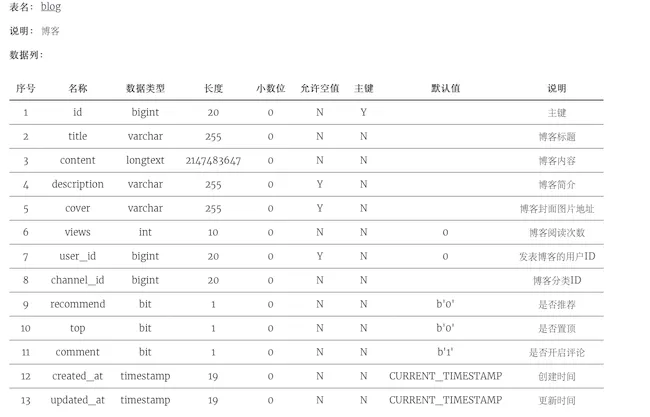
为了验证 Screw 自动生成数据库文档的效果,我们可以创建一个简单的存放博客数据的数据库表。
CREATE TABLE `blog` (
  `id` bigint(20) NOT NULL AUTO_INCREMENT COMMENT '主键',
  `title` varchar(255) NOT NULL COMMENT '博客标题',
  `content` longtext NOT NULL COMMENT '博客内容',
  `description` varchar(255) DEFAULT NULL COMMENT '博客简介',
  `cover` varchar(255) DEFAULT NULL COMMENT '博客封面图片地址',
  `views` int(11) NOT NULL DEFAULT '0' COMMENT '博客阅读次数',
  `user_id` bigint(20) DEFAULT '0' COMMENT '发表博客的用户ID',
  `channel_id` bigint(20) NOT NULL COMMENT '博客分类ID',
  `recommend` bit(1) NOT NULL DEFAULT b'0' COMMENT '是否推荐',
  `top` bit(1) NOT NULL DEFAULT b'0' COMMENT '是否置顶',
  `comment` bit(1) NOT NULL DEFAULT b'1' COMMENT '是否开启评论',
  `created_at` timestamp NOT NULL DEFAULT CURRENT_TIMESTAMP COMMENT '创建时间',
  `updated_at` timestamp NOT NULL DEFAULT CURRENT_TIMESTAMP COMMENT '更新时间',
  PRIMARY KEY (`id`)
) ENGINE=InnoDB AUTO_INCREMENT=16 DEFAULT CHARSET=utf8mb4 COMMENT='博客';
基于 Java 代码的使用
引入依赖
首先,创建一个普通的 Maven 项目,并引入以下三个依赖:Screw、HikariCP 和 MySQL。
<!--screw-->
<dependency>
    <groupId>cn.smallbun.screw</groupId>
    <artifactId>screw-core</artifactId>
    <version>1.0.5</version>
</dependency>
<!-- HikariCP -->
<dependency>
    <groupId>com.zaxxer</groupId>
    <artifactId>HikariCP</artifactId>
    <version>3.4.5</version>
</dependency>
<!--MySQL-->
<dependency>
    <groupId>mysql</groupId>
    <artifactId>mysql-connector-java</artifactId>
    <version>8.0.20</version>
</dependency>
您可以通过以下链接在 mvnrepository 获取 Screw 的最新版本。
编写代码逻辑
生成数据库文档的代码逻辑相对简单,我们只需经过以下五个步骤:
// 1. 获取数据源
DataSource dataSource = getDataSource();
// 2. 获取数据库文档生成配置(文件路径、文件类型)
EngineConfig engineConfig = getEngineConfig();
// 3. 获取数据库表的处理配置,可忽略
ProcessConfig processConfig = getProcessConfig();
// 4. Screw 完整配置
Configuration config = getScrewConfig(dataSource, engineConfig, processConfig);
// 5. 执行生成数据库文档
new DocumentationExecute(config).execute();
步骤一:获取数据库源
配置数据库及连接池,务必将相关配置修改为您自己的信息。
/**
 * 获取数据库源
 */
private static DataSource getDataSource() {
    // 数据源
    HikariConfig hikariConfig = new HikariConfig();
    hikariConfig.setDriverClassName("com.mysql.cj.jdbc.Driver");
    hikariConfig.setJdbcUrl("jdbc:mysql://127.0.0.1:3306/javaguide-blog");
    hikariConfig.setUsername("root");
    hikariConfig.setPassword("123456");
    // 设置可以获取 tables remarks 信息
    hikariConfig.addDataSourceProperty("useInformationSchema", "true");
    hikariConfig.setMinimumIdle(2);
    hikariConfig.setMaximumPoolSize(5);
    return new HikariDataSource(hikariConfig);
}
步骤二:获取文件生成配置
这一步指定数据库文档的生成位置、文件类型及文件名称。
/**
 * 获取文件生成配置
 */
private static EngineConfig getEngineConfig() {
    // 生成配置
    return EngineConfig.builder()
            // 生成文件路径
            .fileOutputDir("/Users/guide/Documents/代码示例/screw-demo/doc")
            // 打开目录
            .openOutputDir(true)
            // 文件类型
            .fileType(EngineFileType.HTML)
            // 生成模板实现
            .produceType(EngineTemplateType.freemarker)
            // 自定义文件名称
            .fileName("数据库结构文档").build();
}
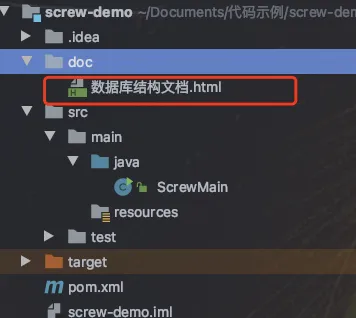
如果不指定生成文件路径,默认将存放在项目的 doc 目录。此外,这里我们指定生成的文件格式为 HTML,Screw 还支持 Word 和 Markdown 格式。虽然可以生成 Word 格式,但更推荐使用 Markdown 格式。
步骤三:获取数据库表的处理配置
可以指定忽略生成的表。
/**
 * 获取数据库表的处理配置,可忽略
 */
private static ProcessConfig getProcessConfig() {
    return ProcessConfig.builder()
      // 指定只生成 blog 表
      .designatedTableName(new ArrayList<>(Collections.singletonList("blog")))
      .build();
}
您也可以指定需要忽略的表。
private static ProcessConfig getProcessConfig() {
    ArrayList<String> ignoreTableName = new ArrayList<>();
    ignoreTableName.add("test_user");
    ignoreTableName.add("test_group");
    ArrayList<String> ignorePrefix = new ArrayList<>();
    ignorePrefix.add("test_");
    ArrayList<String> ignoreSuffix = new ArrayList<>();
    ignoreSuffix.add("_test");
    return ProcessConfig.builder()
            // 忽略表名
            .ignoreTableName(ignoreTableName)
            // 忽略表前缀
            .ignoreTablePrefix(ignorePrefix)
            // 忽略表后缀
            .ignoreTableSuffix(ignoreSuffix)
            .build();
}
这一步可以省略,如果不指定 ProcessConfig,则会使用默认配置。
步骤四:生成 Screw 完整配置
根据前面的三步,生成 Screw 的完整配置。
private static Configuration getScrewConfig(DataSource dataSource, EngineConfig engineConfig, ProcessConfig processConfig) {
    return Configuration.builder()
            // 版本
            .version("1.0.0")
            // 描述
            .description("数据库设计文档生成")
            // 数据源
            .dataSource(dataSource)
            // 生成配置
            .engineConfig(engineConfig)
            // 生成配置
            .produceConfig(processConfig)
            .build();
}
步骤五:执行生成数据库文档
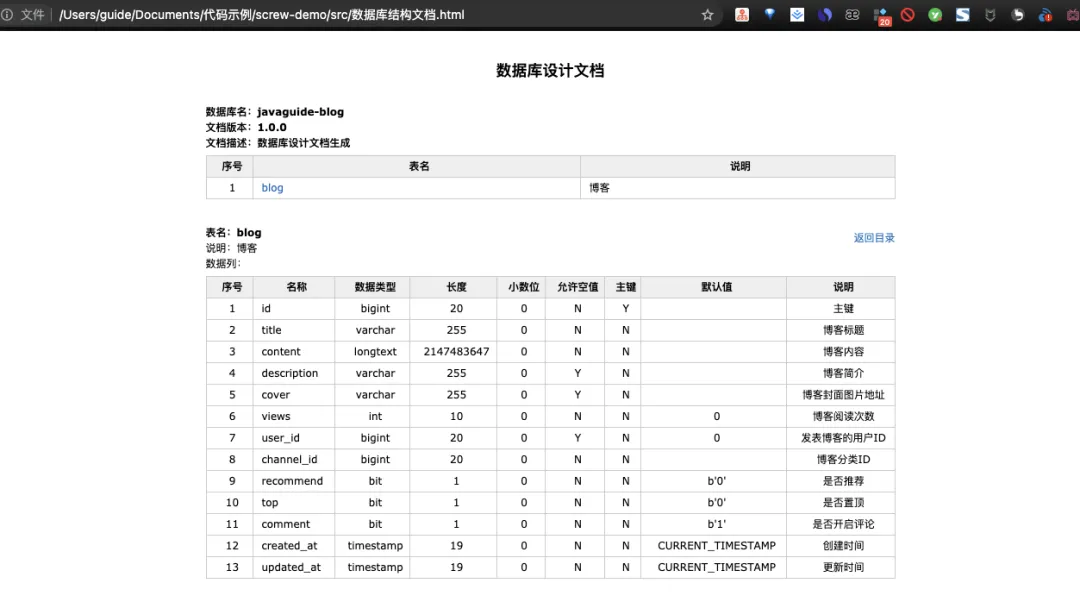
 以上就是生成的 HTML 格式的数据库设计文档。
使用 Maven 插件生成数据库文档
除了通过 Java 代码生成外,您还可以使用 Screw 提供的 Maven 插件来生成数据库文档。这个过程也非常简单!
步骤一:配置 Maven 插件
请确保将数据库相关配置修改为您自己的信息。
<build>
    <plugins>
        <plugin>
            <groupId>cn.smallbun.screw</groupId>
            <artifactId>screw-maven-plugin</artifactId>
            <version>1.0.5</version>
            <dependencies>
                <!-- HikariCP -->
                <dependency>
                    <groupId>com.zaxxer</groupId>
                    <artifactId>HikariCP</artifactId>
                    <version>3.4.5</version>
                </dependency>
                <!--mysql driver-->
                <dependency>
                    <groupId>mysql</groupId>
                    <artifactId>mysql-connector-java</artifactId>
                    <version>8.0.20</version>
                </dependency>
            </dependencies>
            <configuration>
                <!--username-->
                <username>root</username>
                <!--password-->
                <password>123456</password>
                <!--driver-->
                <driverClassName>com.mysql.cj.jdbc.Driver</driverClassName>
                <!--jdbc url-->
                <jdbcUrl>jdbc:mysql://127.0.0.1:3306/javaguide-blog</jdbcUrl>
                <!--生成文件类型-->
                <fileType>MD</fileType>
                <!--打开文件输出目录-->
                <openOutputDir>true</openOutputDir>
                <!--生成模板-->
                <produceType>freemarker</produceType>
                <!--文档名称 为空时:将采用[数据库名称-描述-版本号]作为文档名称-->
                <fileName>数据库结构文档</fileName>
                <!--描述-->
                <description>数据库设计文档生成</description>
                <!--版本-->
                <version>${project.version}</version>
                <!--标题-->
                <title>数据库文档</title>
            </configuration>
            <executions>
                <execution>
                    <phase>compile</phase>
                    <goals>
                        <goal>run</goal>
                    </goals>
                </execution>
            </executions>
        </plugin>
    </plugins>
</build>
步骤二:手动执行生成数据库文档
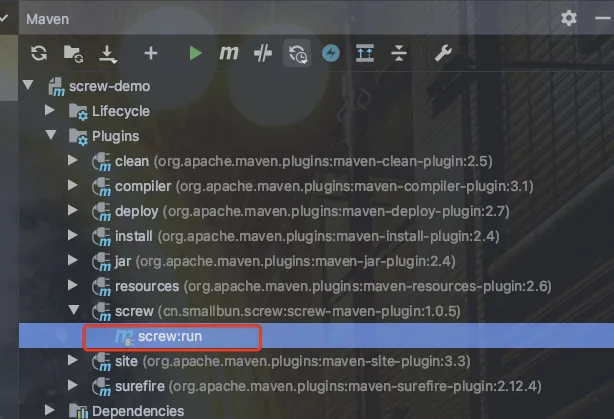 可以看到,我们这里生成的是 Markdown 格式的文档。
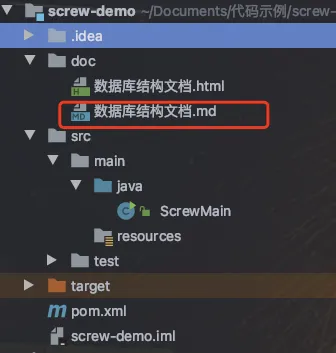 下图展示了生成的 Markdown 格式的数据库设计文档,效果十分理想!
结尾:总结与展望
通过使用 Screw 工具,您可以快速高效地生成数据库文档,大大减轻了手动维护的负担。希望这个工具能够帮助到各位开发者,让数据库文档的管理变得更简单。谢谢大家的阅读,期待下次再见!